

This will be the basics of homebrewing a nintendo dsi using Flipnote Lenny.
NEEDED ITEMS: Nintendo DSI, SD card, SD card reader, a PC or Laptop, and a way to extract files and archives.
What is homebrew?
Homebrew applications are unlicensed softwarer made for closed systems. (Nintendo DSI, 3DS, iPhone, etc) These homebrews can be used for basic utilities or custom games, it opens up the possiblities of what the DSI can do.
Step 1: Insert SD card into PC.
Step 2: Download the most recent release of TwiLight Menu++ and unzip it using 7-zip
Step 3: Download latest release of dumpTool
Step 4: Copy the _nds folder from TwiLightMenu-DSi.7z to the root of the SD card
Step 5: Copy the BOOT.NDS from TwiLightMenu-DSi.7z to the root of the SD card
Step 6: Copy the dumpTool.nds to the root of the SD card
Step 7: Download Flipnote Lenny and extract it. Then move the "private" folder into the SD card
NOTE: make sure you have the frog button on and start on calender off.
Step 8: Save and take SD card out of pc. Place it in designated spot in Nintendo DSi
Step 9: Boot up Nintendo DSi and launch flipnote studio
Step 10: Click the "View FLipnote" button 
Step 11: Click the "SD card" button and view the flipnotes on the SD card
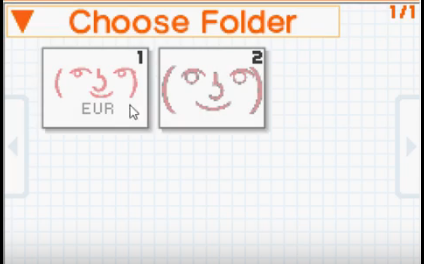
Step 12: Tap on the face that corresponds with your region (eu, usa, jpn, etc.)
Step 13: Edit the selected flipnote.
Step 14: Tap on the frog icon in the bottom left corner
Step 15:Click the film roll icon. Should look like this. 
Step 16: Select "Copy>Back>Exit"
Step 17:Tap on second note with larger face and select edit
Step 18: Tap film roll icon again
Step 19: Select paste.
If the top screen turns green, then you are missing the TwiLight Menu file "BOOT.NDS" in the root of your SD card. Repeat steps 1-7.
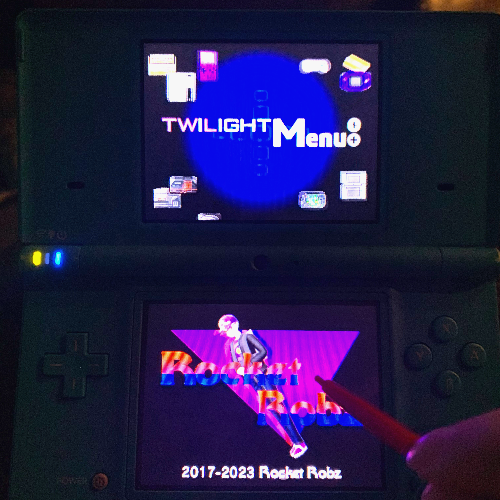
Congrats! You can now use TwiLight Menu++! It will ask you to select your language and region but these do not need to match your console so set them to whatever you would like. It's recommended that you make a NAND backup but thats too long to put on here so check this tutorial for help.
To add games and applications you will need to use scary looking sites like this. 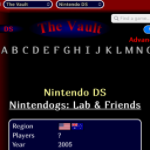
but that's a different tutorial for a different time.